Home Improvement stores sell an item called Polycarbonate or Lexan. It’s a kind of plastic that is straightforward. I purchased a few bits of it. You can see the sheets in the image. Note that it has a sheet of slender plastic covering the two sides. You just strip this defensive covering off when you are prepared to utilize it. The Lexan polycarbonate sheets that I utilized are named as .093 inch thick. It tends to be somewhat interesting to stick these pieces together into a decent block shape and keep it all straight. Allow me to show you a stunt. The paste that I utilized is classified as “100% Silicone Sealant for Plastic sheets and different plastics”. There are a ton of various sealants that you can utilize including clear silicone caulks. Cut your five bits of Lexan and slide them right down into the case. This way they are by and large the correct shape and size. Terrarium Workshop Singapore can make these all work easily.
Take the top sheet off and stick the sides all together this makes the process go advance
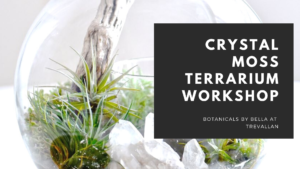
At that point stick the top on. Sitting in a case like this holds it all together pleasantly while it is drying. When it is dry you can take it out. Next, add little bits of wood all-around within the edge. Mine are put one inch down from the top lip. The reasonable plastic box you made will presently sit on this. All the terrarium projects that I have done this sort of project is the one I appreciate the most. I imagine that it looks the best however it is likewise the most difficult to make. Generally, this instructional exercise utilizes a six-gallon wine producer’s container, called a carboy. Yet, the entirety of the methods applies to pretty much any size container including a one-gallon container. Along these lines, on the off chance that you would prefer not to be this forceful, you can attempt your hand at the one-gallon size. Here is a glance at the materials used to make this terrarium. Excluding the plants!
From Left to right
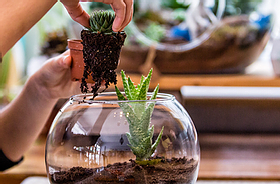
African Violet Soil, Sphagnum Moss, Soil cover (stones), Pumice (For Barbecue Grills) Before Starting, be certain to clean out your glass holder with light lathery water. The dish cleanser is great. Simply make certain to flush the holder out well before beginning. We don’t need any cleanser buildup to stay in the compartment. It will push through everything given enough time. Put a layer of rocks in the holder. An ordinary compartment around a one-inch-thick layer is acceptable. However, for a major holder like this put around a two-inch thick layer. Next, put a layer of Sphagnum greenery directly on top of the rocks. Break it up depending on the situation to fit it into the compartment. At that point utilize an instrument to pack everything down. It should shape a decent layer about an inch thick. Next, put your layer of soil. I utilized a pipe to gradually empty it into the container. Allow it to frame a pleasant cone directly in the center of the container as the image shows. This will assist with keeping the glass of the container quite perfect. Anytime during the creation of the terrarium, you can generally join a piece of paper towel to a coat holder and utilize that to reach inside and clean the sides of the container.